
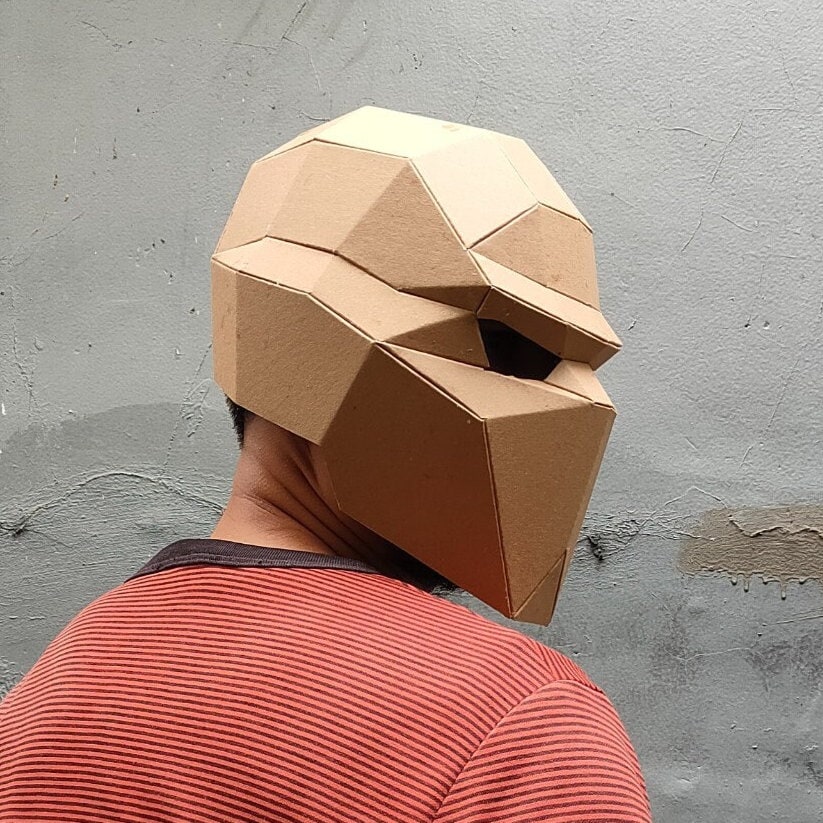
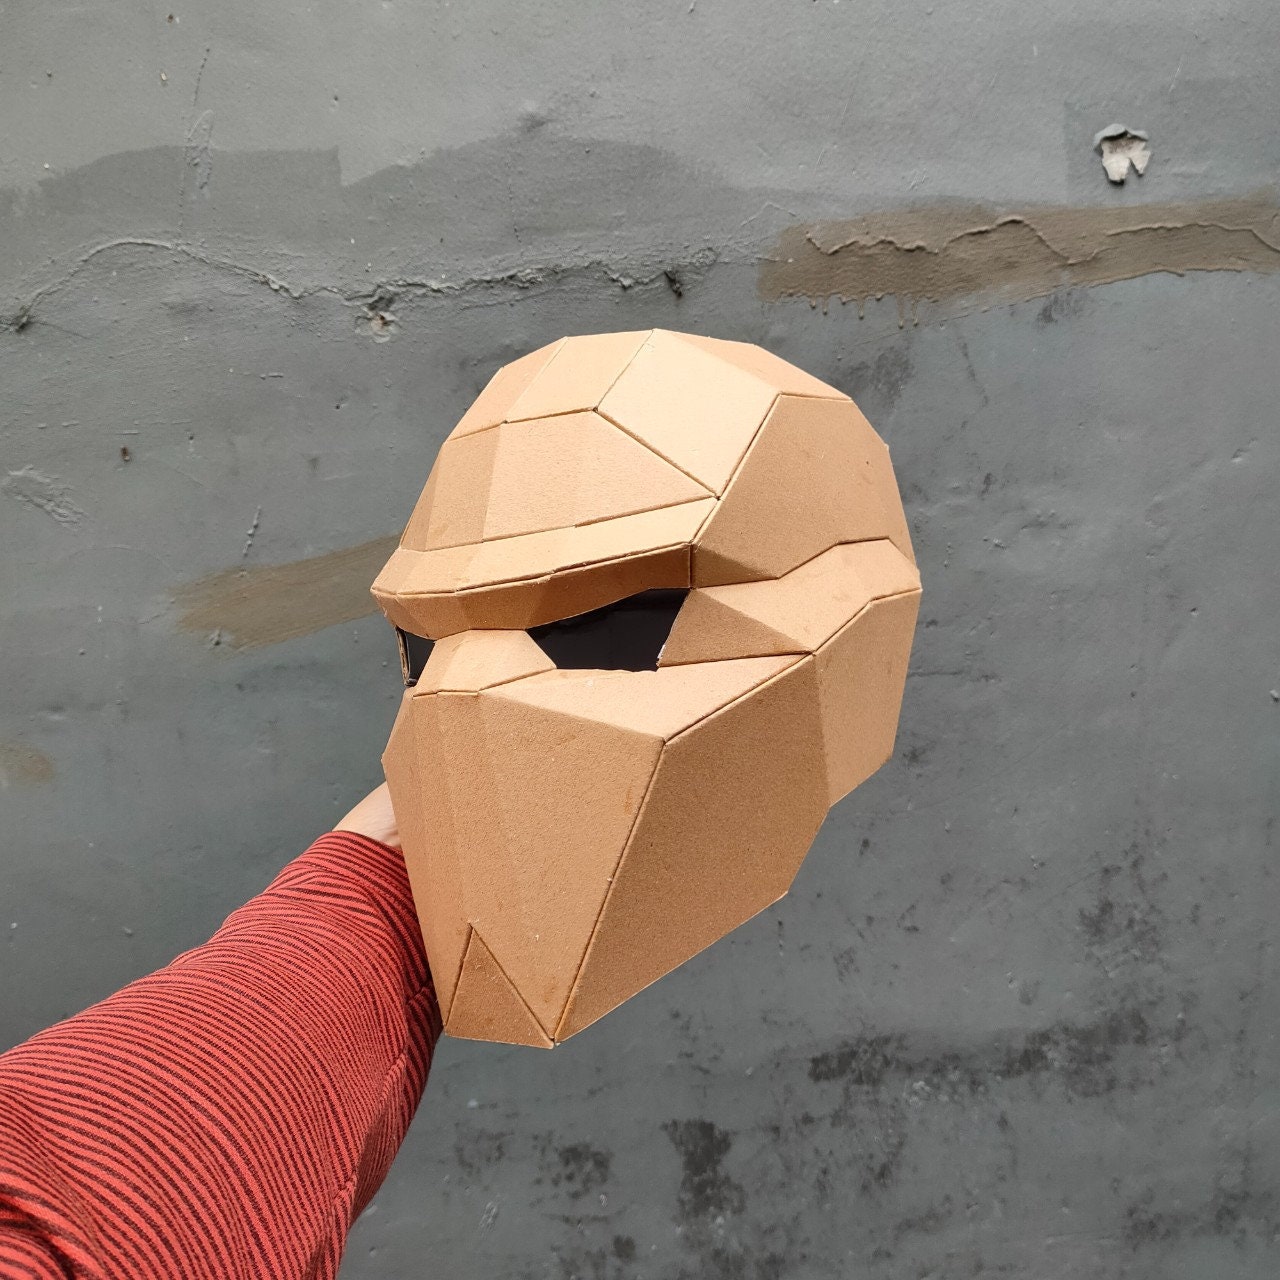
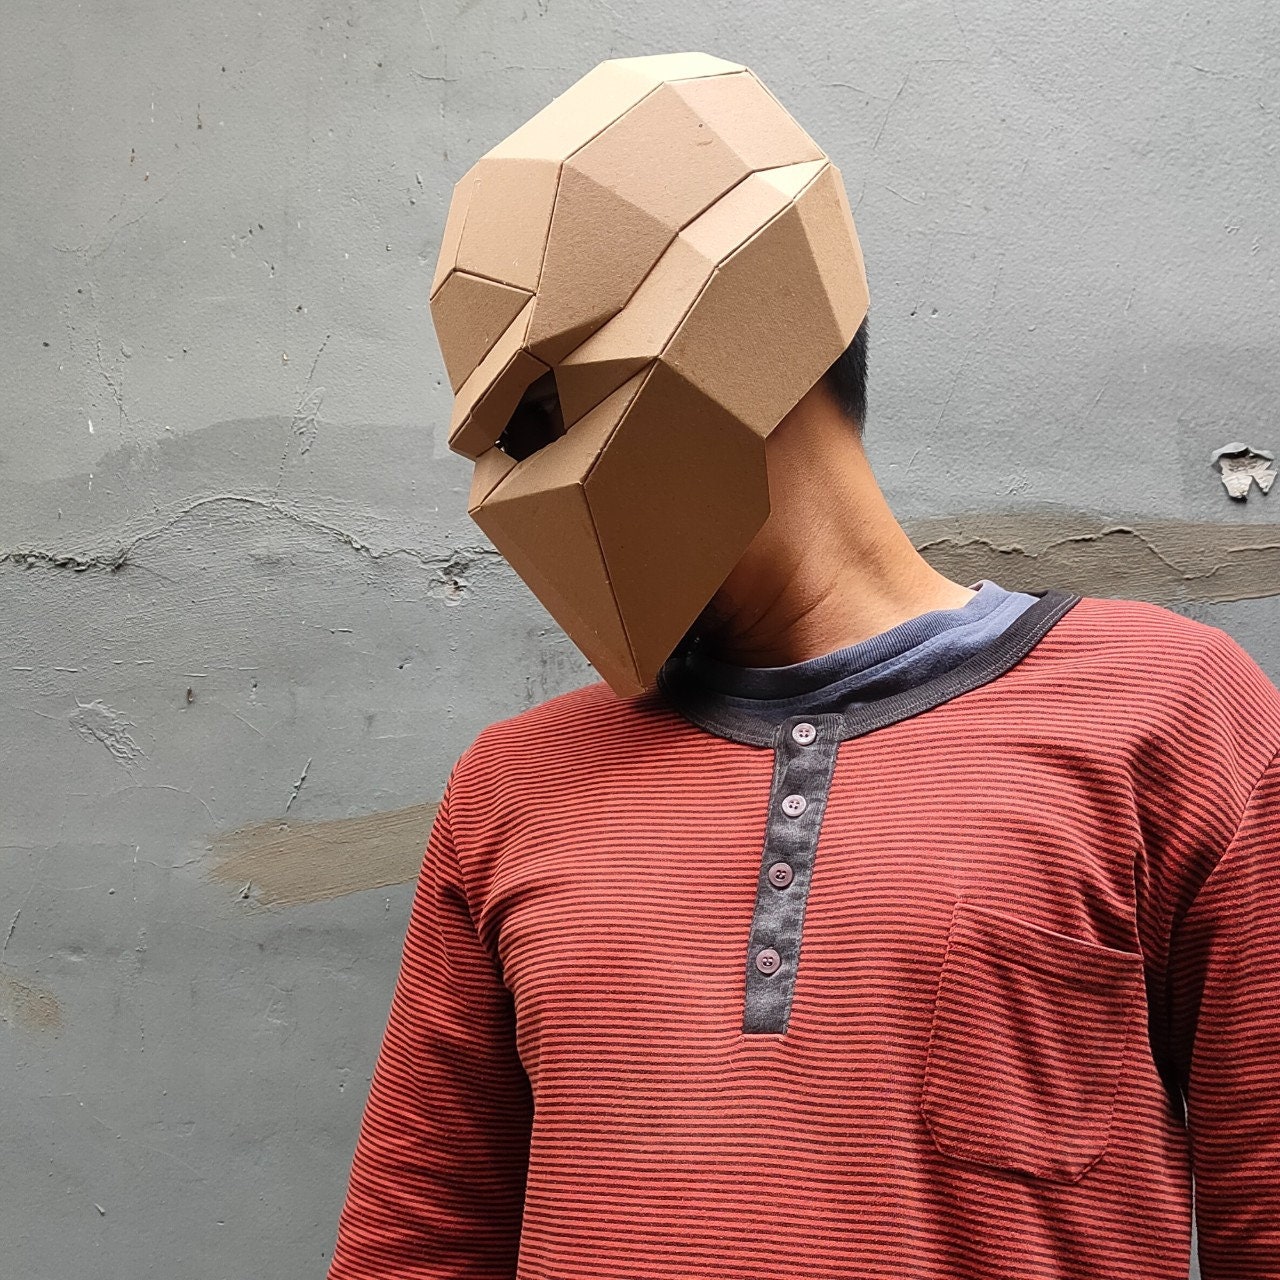
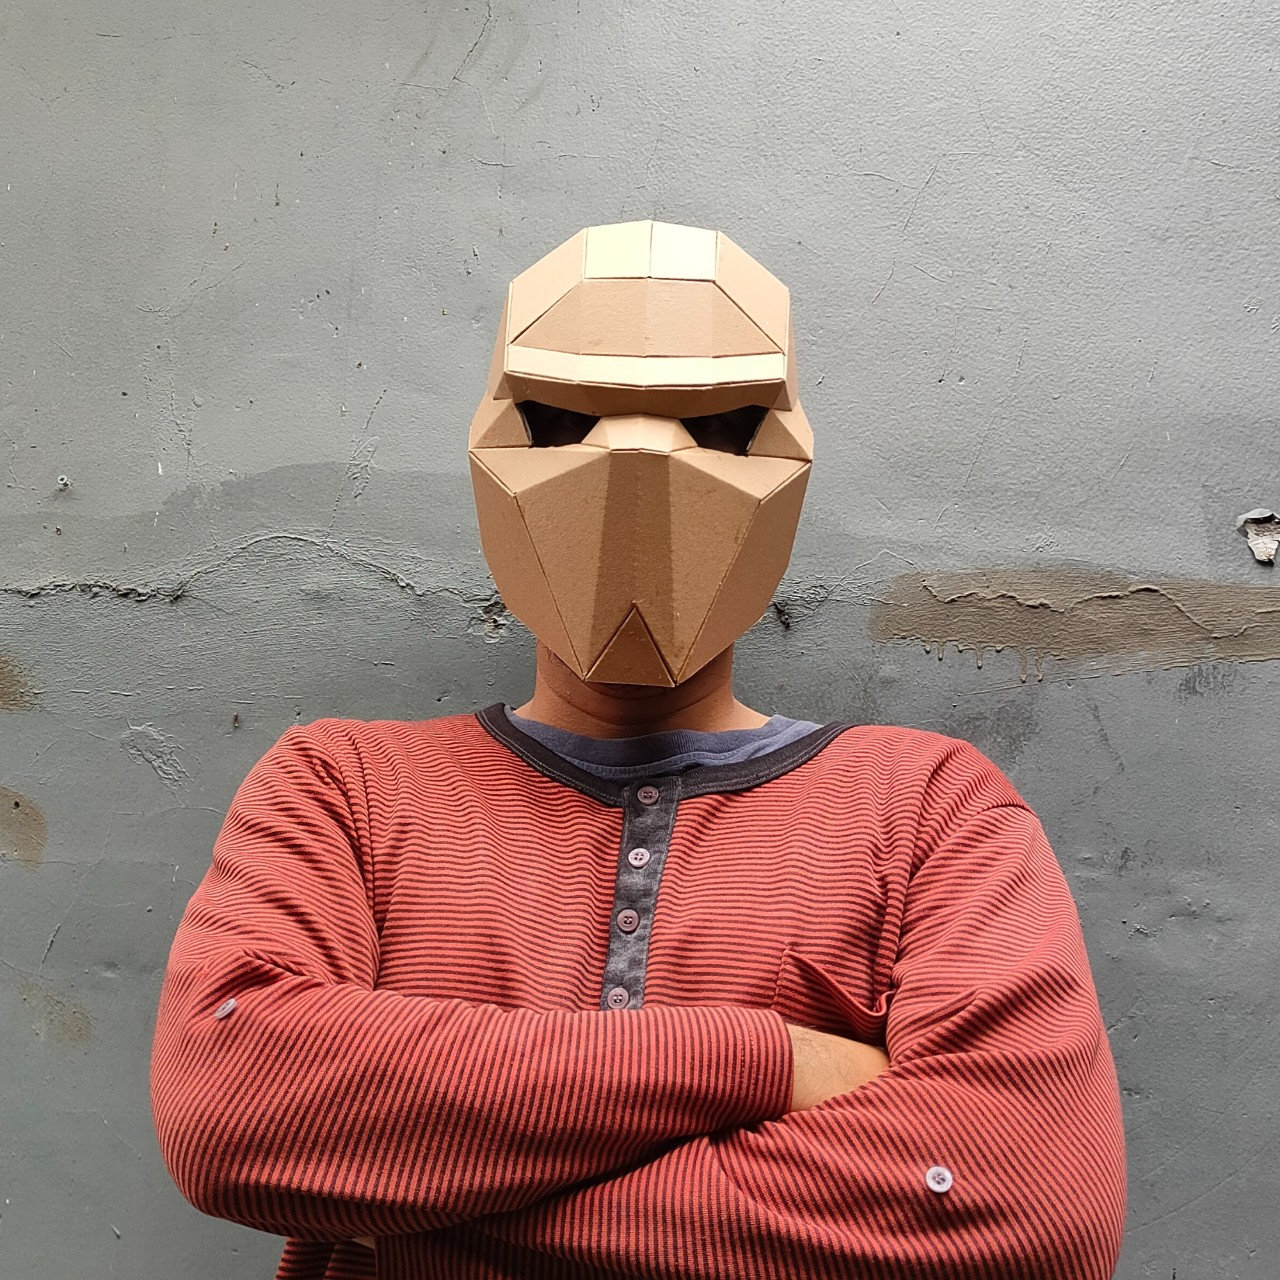
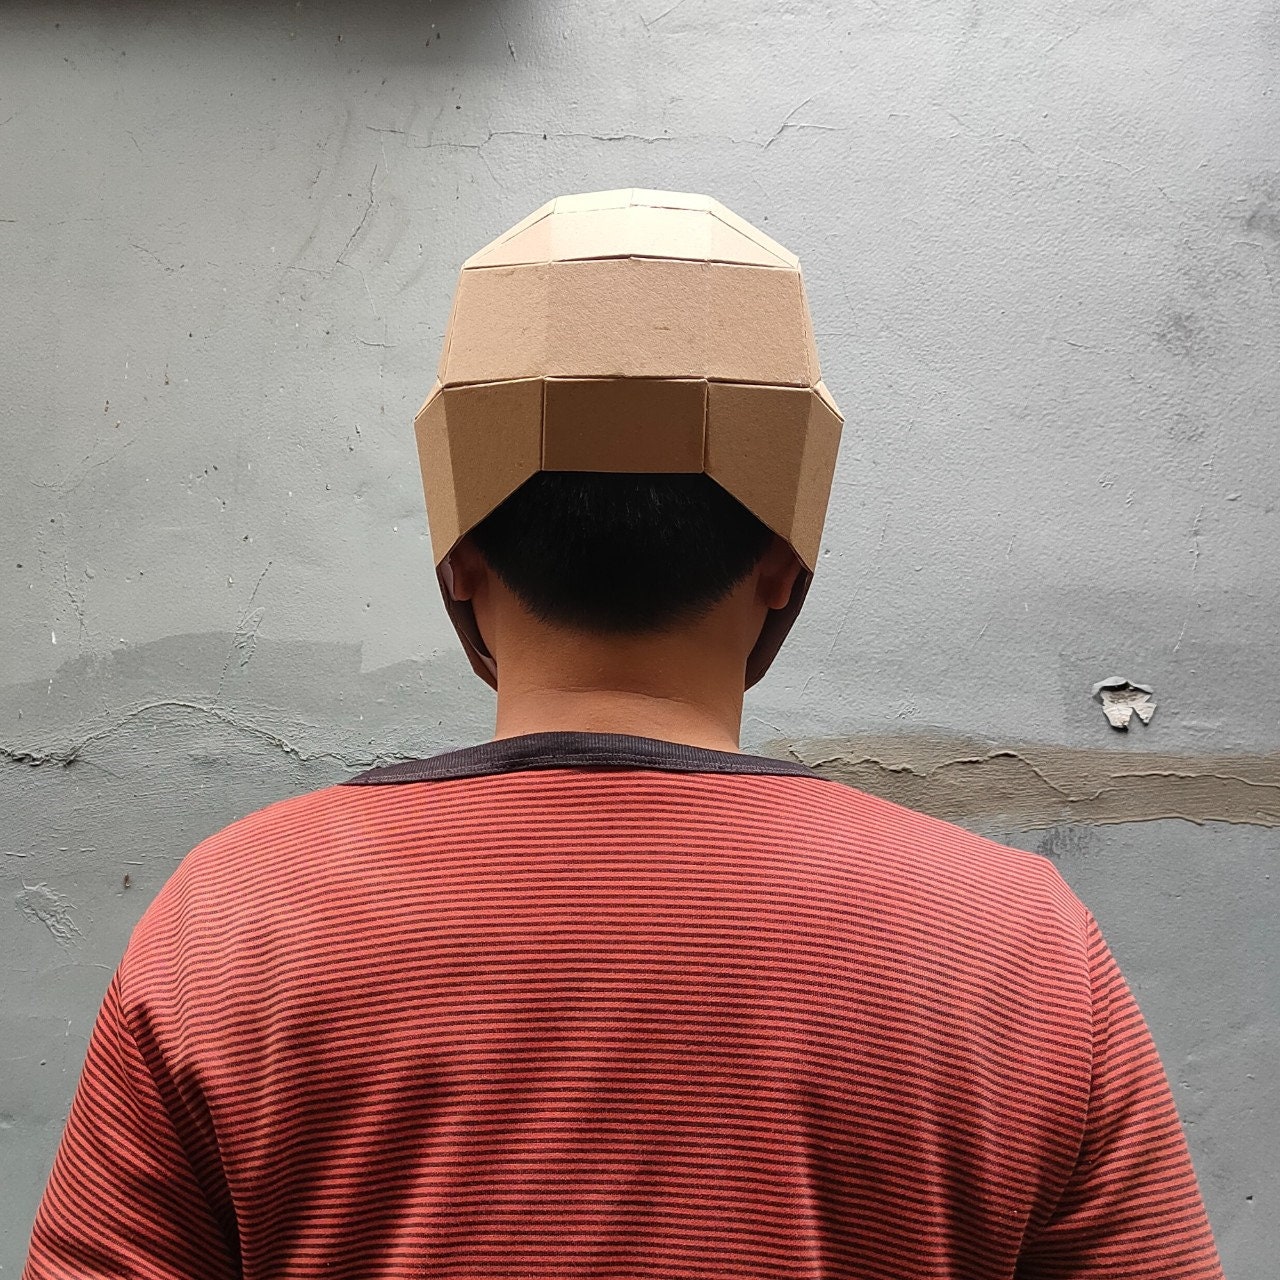
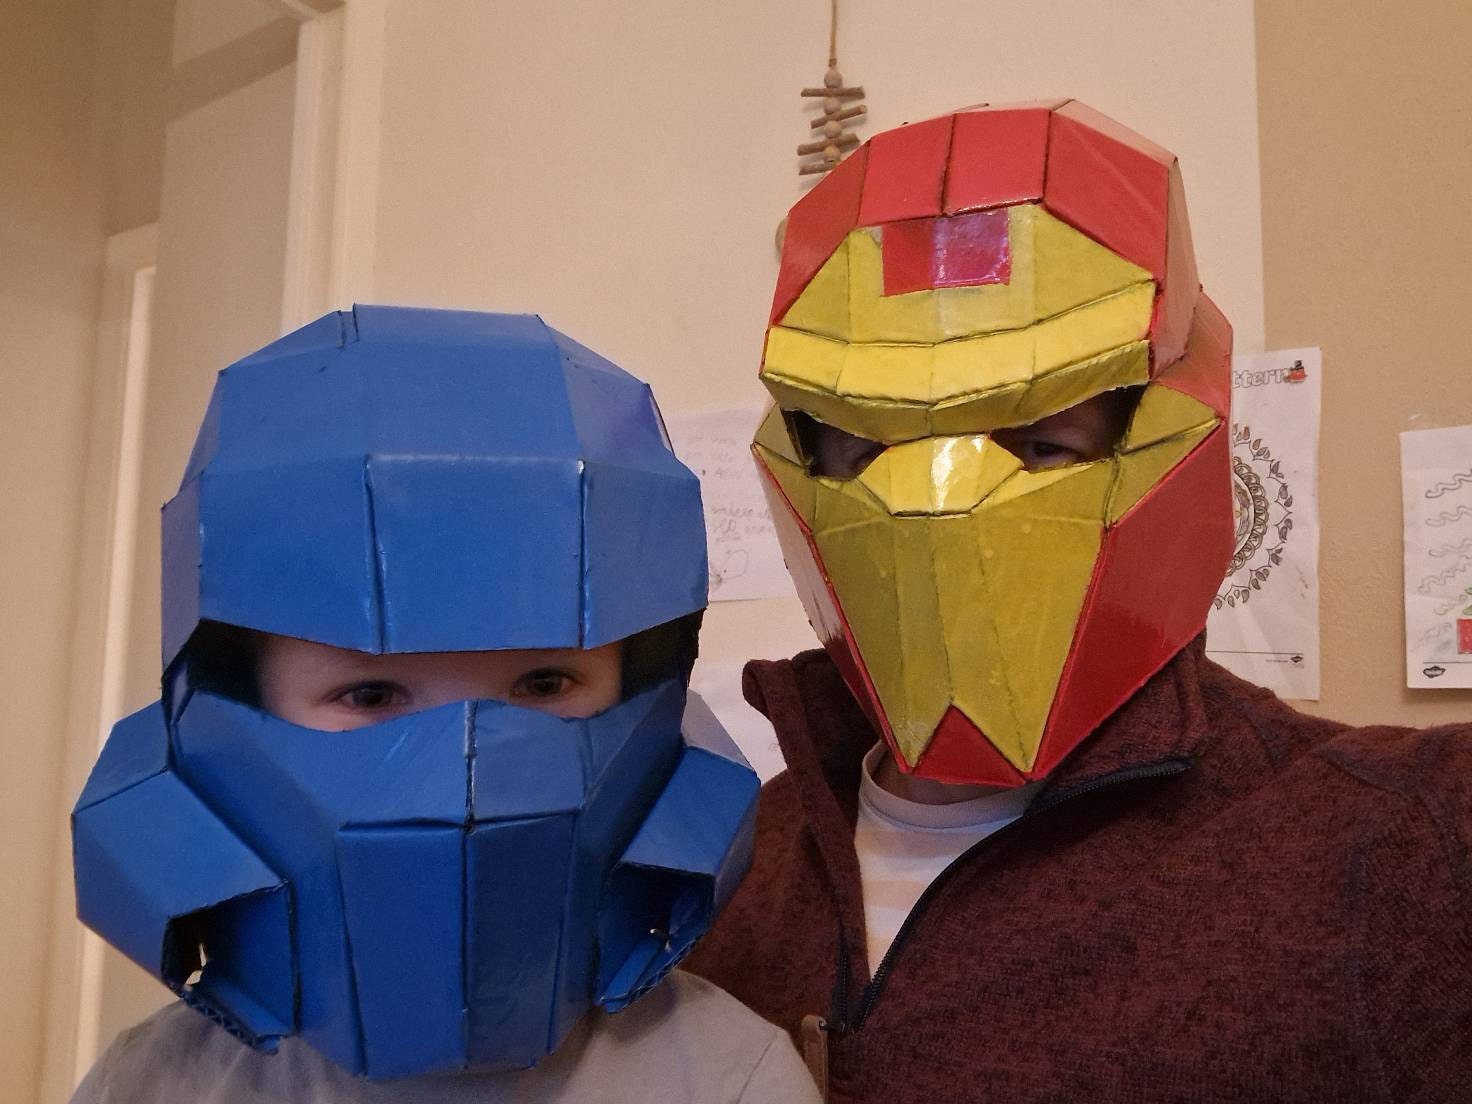
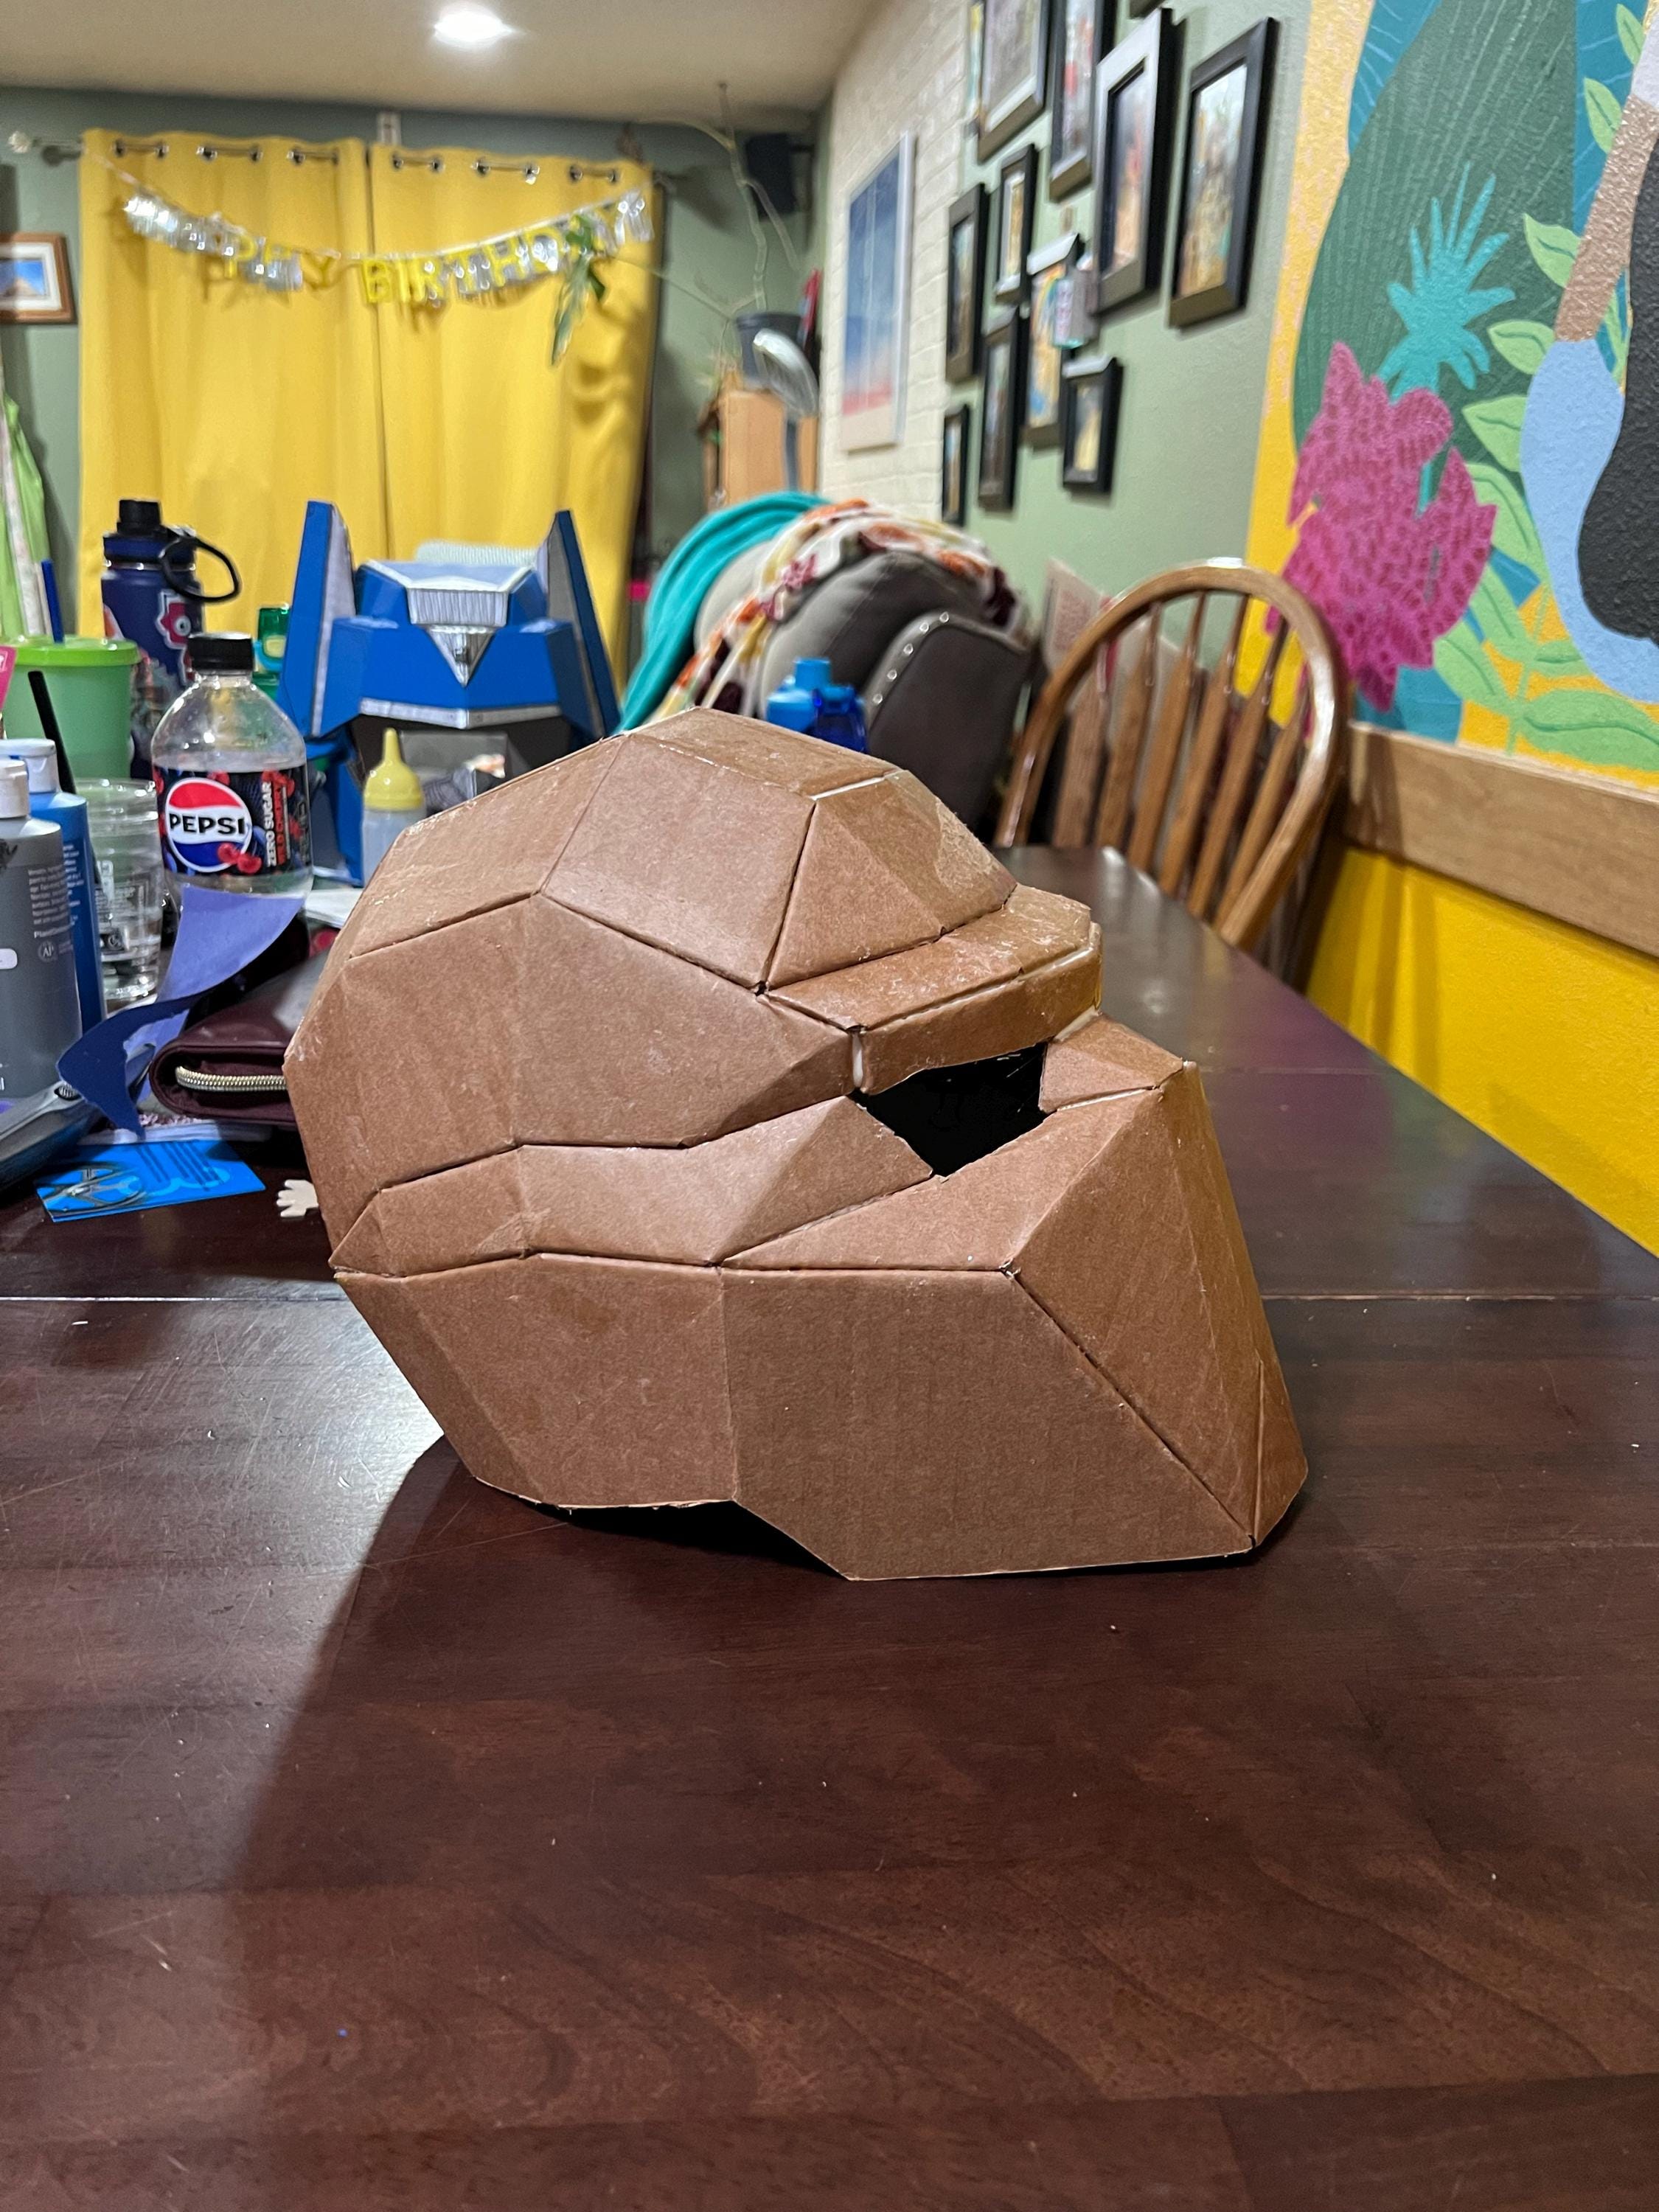
Cardboard tactical helmet Template. DIY Printable Pattern for creating tactical helmet that looks like skull.

$6.00
With this printable template, you can make a sturdy, neat and sustainable cardboard tactical helmet craft just like in the photo. The face looks like skull. You can use it for superhero mask too.
This templates is designed for corrugated cardboard with maximum thickness of 4mm (c-flute cardboard). The best cardboard to use is E-flute 1.5mm for example, shoes box, pizza box, toys box. You can also apply this to a paper with grammage minimum of 150gram or any cardstock like cereal box.
FILES INCLUDED:
1. PDF Instructions (English and Indonesia)
- Step-by-step illustrated instruction with QR-code and link to video tutorial
- Secret tips and tricks for neat and sturdy cardboard craft
- Scaling/resizing tutorial (yes, you can rescale it to whatever size you want)
2. PDF template file for print (The_Template_1527.pdf)
- Consists of 19 pieces in 7 pages (A4 size paper).
3. Head cushion template if applicable (mainly for headpiece templates)
4. A Zip file containing all of the files above
WHAT MAKE OUR TEMPLATE SPECIAL?
- Designed for corrugated cardboard. Unlike paper, corrugated cardboard has thickness. And our template is designed to deal with that!
- Can be used on new cardboard or USED cardboard. It is a sustainable craft in mind!.
Just search for cardboard with thickness ranging from 0.5mm to 4mm. You can use thicker than 4mm but that will need more energy to fold. For best result: just buy new 1.5mm thick E-Flute cardboard.
- A4 Native paper with no splitted piece.
Each pieces inside of this template are less than A4 wide. This gives you three advantages: 1. You don't need to unify the the splitted templates before applying them to cardboard because no part is splitted. 2. It doesn't require wide cardboard, so you can use any cardboard scraps at home, and 3. Easier to print because A4 paper and printer are widely available worldwide.
- Fast and easy. KRAF Studio's crafting technique is relatively fast and easy compared to another cardboard crafting techniques.
- It use easy-to-find tools
- Our templates conceal cardboard edge. Makes it looks tidy and seamless.- All is tested. You can check on our Youtube for the real non-cut video walkthrough.
- Each template has comprehensive step-by-step tutorial with videos and also secret tips and tricks for neat cardboard crafts.
TOOLS and MATERIALS
- Corrugated cardboard with thickness up to 4mm. Higly recomended using 1.5mm thick E-Flute cardboard.
- Cutter
- Cutting mat
- Scissor
- Ruler
- flat screwdriver- paper binder clips
- tape (optional)
INSTRUCTION
1. Print the PDF template (The_Template_1527.pdf) on A4 paper. Tips: Print it on A4 sticker/label paper to save time and effort.
2. Stick the template into the corrugated cardboard
3. Cut the cardboard along straight red line (cut line)
4. Use a flat screwdriver and a ruler to score along the fold lines (the dashed line)
5. Fold the cardboard along scored lines
6. Find matching numbers and glue them
*Printed template side will be hidden inside the model after completion.
Our designs are protected by copyright and are intended for personal use only. Would you like to make a commercial use? Contact us!
The walkthrough video of making the cardboard Cool skull helmet on the photo above is available on the following link
https://www.youtube.com/watch?v=7w1PMCdEovM
Follow us on Instagram (@krafstudio) so you don’t miss any upcoming releases!
Reviews (14)
Average:
Apr 29, 2025
Very detailed instructions, well composed kit. love it!
Igor
Feb 8, 2025
Superb. builds exactly as description and images show
canniral85
Dec 3, 2024
Great item, good fun to make with the kids, and result is both a great looking helmet and surprisingly robust.
Gareth Rippingale
Oct 30, 2024
This was as described and the directions were clear to follow.
Neal Page
Sep 26, 2024
This is the second mask I’ve made from this sellers patterns. I was able to follow the sellers magnificent directions and increase the print size to 105% to fit my husband’s head. The only downside is the print size is based on A4 paper size. I opened it in a different program to shift the pieces to fit on US letter 8.5 x 11 inch. Towards the end of assembling, I did need an extra pair of hands to help me clip the seams together but that’s no big deal. It came out amazing!
Angelina Nockai